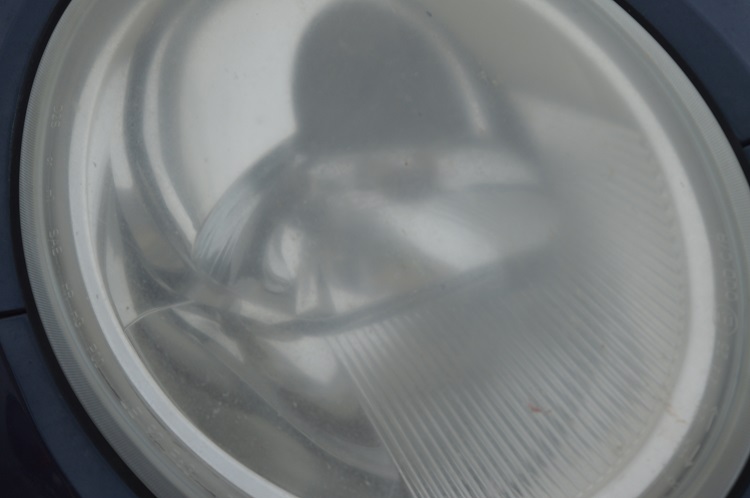
This past Bank holiday weekend, I decided to spend some time cleaning the headlights on the other car in our household. Over time the headlight lens has turned cloudy and slightly yellow. This isn’t a good look at all!
I also didn’t want to buy and then fit a new pair of headlights.

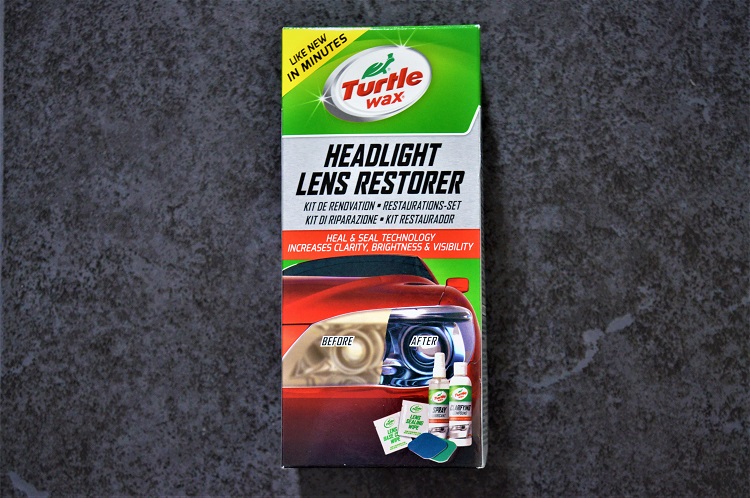
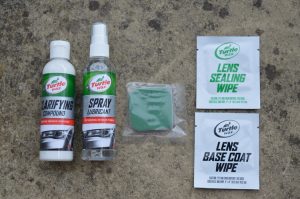
I looked on the internet for a car headlight cleaning kit and came across the Turtle Wax Headlight Restorer Kit. Included In the kit is: Clarifying Compound, Spray Lubricant, rubbing pads, Lens Sealing Wipe, Lens Base Coat Wipe and a plastic glove.
I was slightly sceptical and I did think there must be a better way to spend a Bank holiday Sunday than cleaning a car’s headlights… but I have chosen to share this blog with you because I was really impressed with the results and it will be helpful if anyone else’s car is suffering with yellowing of the headlights!
Below is a write up of what I did.
First of all I washed the headlight lens with water just to remove any surface dirt, flies and muck.
Then I applied the Clarifying Compound to my Kent Microfibre cloth and rubbed it hard onto the headlight. After that I buffed it off with a clean microfibre cloth to see how much more of the surface grime had been removed.
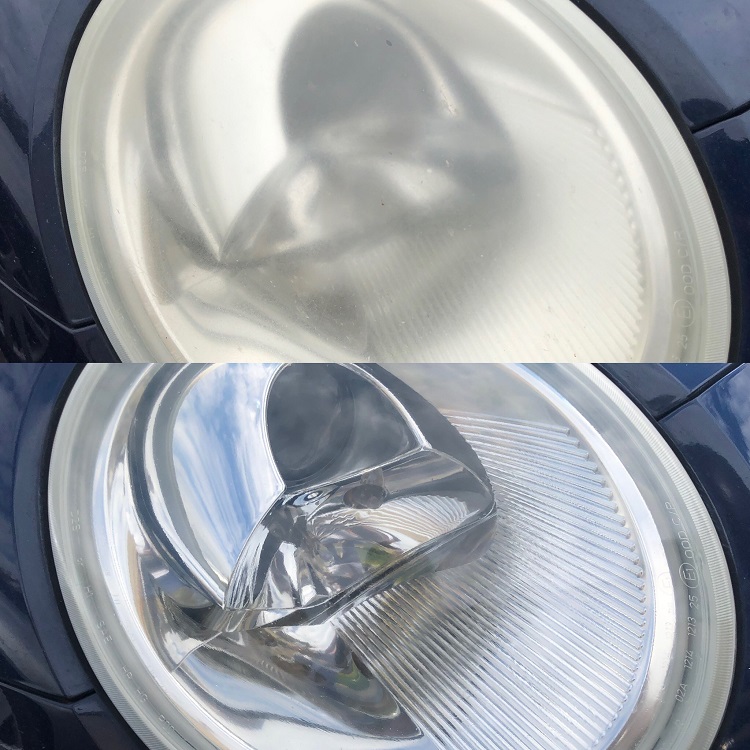
The headlight lens was cleaner but not great!
On to the next step –
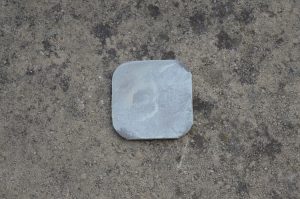
I then applied the Spray Lubricant onto the Level 1 green pad and basically rubbed it all over the headlight lens. This is the messy part because the headlight lens goes very, very cloudy. I flipped the Level 1 green pad over to the other side (which is the Level 2 brown pad side) and continued rubbing. To be honest my heart was in my mouth…. I was hoping that I hadn’t just ruined the headlight lens. So as I wasn’t feeling too confident….I skipped using the Level 3 and Level 4 pads which are included in the Headlight Restorer Kit.
Feeling a little nervous, I dried the headlight lens off and applied the Clarifying Compound (rubbing it furiously onto the headlight lens thinking to myself please clear up). I let the Clarifying Compound dry. This is when it goes even more cloudy and hazy, I then buffed it off with a cloth.
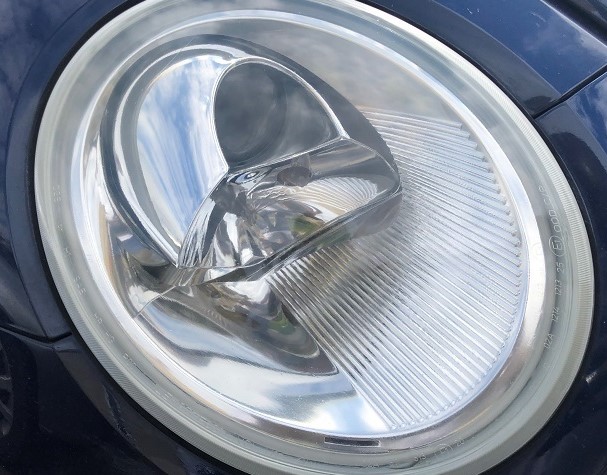
To my amazement (and relief) not only did it clear up…. they almost look like new headlights!!
I was amazed!
Then it was the final part of the headlight restoration.
I cleaned the headlight lens thoroughly and then applied the Base Coat Wipe using the plastic glove that is included in the pack. I coated the whole lens with the wipe. When it was dry, I then applied the Lens Sealing Wipe all over the lens. Turtle Wax say that applying the Lens Sealing Wipe will prevent future yellowing. Time will tell….but for the here and now…take a look at the close up of the finished headlight len. It is a complete transformation and the best part……it only took about 30 minutes to do.
This is why I had to share this blog with you all. It wasn’t that hard to do and it transforms the look of the car. Having clear and shiny headlights takes years off a car.
Note to self ….the car headlights should always outshine the paintwork!


Leave A Comment